If you’ve ever been to a convention—whether for marketing or Star Trek—then you already know attendees don’t show up solely to interact with brand ambassadors and buy new products. Rather, the main attraction is often the chance to feel like a member of a community of people who share common interests.
The same can be said of branded Facebook groups: Members may all have a shared affinity for the brand in charge, but what keeps them around is a sense of belonging. When you learn how to start a Facebook group, you can create and grow a thriving community based around your brand, all while generating leads and earning loyal customers in the process.
Why Should You Learn How to Start a Facebook Group?
If you only think about businesses on Facebook in terms of Pages, you can hardly be blamed. After all, an organization’s Page is where users can read and write reviews, quickly access important business information, make appointments and get in touch with representatives.
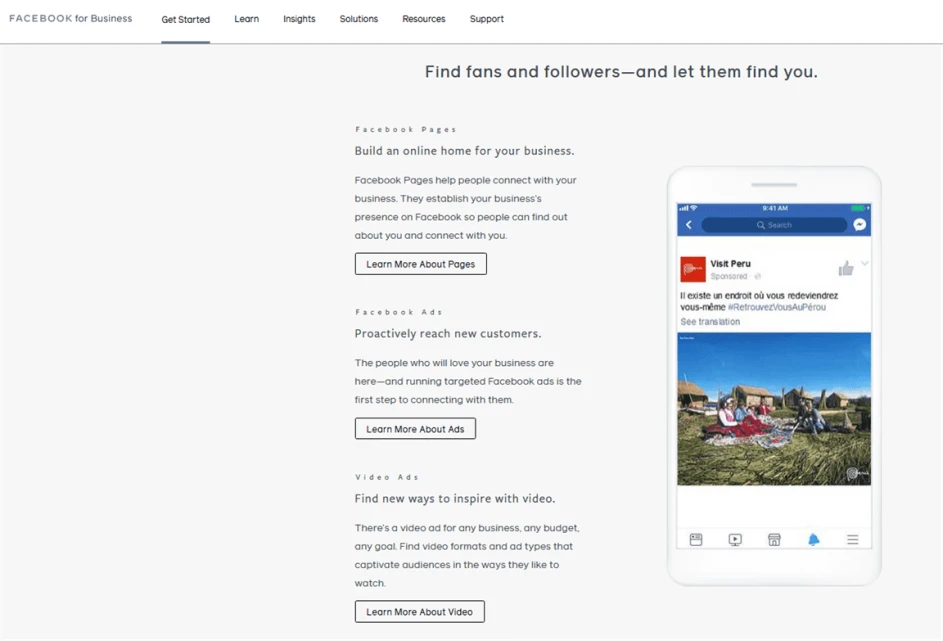
Even the platform’s own Facebook for Business center emphasizes Pages, ads and video, with no mention of groups in sight.

Nevertheless, if you’re not also using Facebook groups to reach your audience then you’re missing out on a priceless opportunity to connect with users, build a loyal customer base and start a community.
As with so many aspects of social media, the reason for this comes down to the algorithm. In January 2018, Facebook CEO Mark Zuckerberg published a post outlining a new change to the network. He wrote, “I’m changing the goal I give our product teams from focusing on helping you find relevant content to helping you have more meaningful social interactions.”
“The first changes you’ll see will be in News Feed,” he explained, “where you can expect to see more from your friends, family and groups. As we roll this out, you’ll see less public content like posts from businesses, brands and media.”
In other words, Facebook tweaked its algorithm to prioritize community-based content over business-based content. While Facebook groups fall firmly under the category of community-based content (Zuckerberg even mentioned them specifically), Pages can be classified as business-based content.
So while Pages are still a crucial aspect of organizations’ Facebook marketing strategy, groups are too—they’re based around true community, and therefore have a much better chance of actually showing up on members’ News Feeds.
Groups aren’t exactly niche, either. As of April 2019, there were more than 10 million groups on Facebook with 1.4 billion active group members per month.
No matter what you thought you knew about groups before, the lesson is clear: It’s the perfect time to learn how to start a Facebook group for your brand and connect with your audience on a deeper level than ever before.
Pages vs. Groups
Facebook’s algorithm isn’t the only reason why groups can be more effective than Pages at building an active community.
For example, Facebook groups allow organizations to interact with users in a more personal way than do Pages: In a group, admins can post and comment from their own accounts. On a business Page, however, admins can only communicate with users from the organization’s official account.
This means members of branded groups can feel like they’re getting to know the proverbial man behind the curtain, while followers of a Page may feel like they’re speaking with a faceless corporate entity.
Even better, groups let members create their own posts, giving active members a sense of ownership and pride in the group’s success. Together, these factors form a recipe for a strong and genuine community users will want to join.
Take Instant Pot’s Facebook Page for example. It boasts more than 280,000 likes at the time of writing—considering the entire city of Orlando, Florida has a similarly sized population, it’s safe to say any brand would be proud of such a number.
And yet, the Instant Pot Community group is where things get truly impressive. With well over 2.5 million members, the group draws significantly more users than the company’s official Page.
The cause of this staggering discrepancy is, in a word, interaction. The group’s members share recipes, meal ideas and photos with each other multiple times per day:
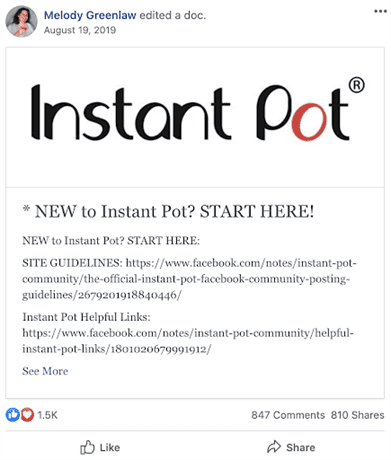
Plus, the group’s administrators use their personal accounts to make announcements and share important information:
The popular BuzzFeed network Tasty’s public Facebook group serves as another prime example. There, the network’s employees can share content and talk with the group’s thousands of members on an individual level:
This type of one-on-one interaction and sense of authentic community is what sets Facebook groups apart from Pages in such a meaningful way.
How to Start a Facebook Group of Your Own
Want to get in on the Facebook group action? First and foremost, you’ll need to choose a name for your group. Ensure it’s keyword-rich (but not keyword-stuffed), includes your brand name, evokes a feeling of community and tells users exactly what they can expect from it.
For instance, the group name Blue Moon Bakery tells users nothing other than which business it belongs to. The group name Blue Moon Bakery Recipe Club, on the other hand, communicates the type of content the group is centered around (baking recipes) and uses the word club to emphasize a theme of sharing and community. Any user who sees the group will know it’s a place to exchange recipes and tips with fellow bakers.
Once you’ve chosen a name, you can create the group itself in just a few steps:
- Click “pages” in the left hand menu and select the Page you want to act as administrator.
- Click the dropdown menu labeled “more” and select “groups.”
- Click “create linked group” and fill out all the necessary fields.
- Click “create.”
Remember, it’s best to create the group with your business Page as the admin rather than your personal account. If you don’t have a business Page yet (wait, really?!), the Facebook Pages section of Facebook for Business has resources you can use to learn about the benefits of Pages and get started on your own.
By creating the group with your business Page, you’ll ensure the group will show up in the “groups” tab of the Page’s navigation bar:
If you do create the group with your personal account as the admin, don’t sweat it too much—you can remedy the situation by adding your brand’s Page as an admin before removing your personal account as one. If you’d like your personal account to retain admin privileges, you can simply link the group to the Page.
After your group is up and running, you’ll be able to add eye-catching details and helpful information like:
- a profile picture and cover photo showcasing your brand’s style (be sure to check Facebook’s size guidelines first);
- a brief “about” section to give visitors an overview of the group;
- business hours;
- contact information such as a phone number, email and street address;
- a link to your brand’s main website;
- a “shop” section where users can easily make purchases; and
- links to other social media accounts such as Instagram and Twitter.
How to Help Your Facebook Group Flourish
Learning how to start a Facebook group is only half the battle: It goes without saying even the most beautifully designed Facebook group won’t be worth much without members to populate it. But how should you proceed when faced with a member count of zero?
Invite People Individually
Start by reaching out to people who already have an interest in your brand. If you have specific people in mind, you can invite them to your group in three steps:
- Go to your group.
- Click the “+ invite” button underneath the group’s cover photo.
- Enter the name of the person you want to invite and click “invite.”
Invite People from Your Page
As long as your Page and group are linked, you can invite people who have already liked your Page in two steps:
- Go to your group.
- Under “people who like [Page Name]” on the right hand side, click “invite” to invite them to your group.
Run Page Likes Ads
Assuming your group is linked to your Page, it will be directly accessible from your Page’s navigation bar. Thus, you can indirectly draw people to your group by directly drawing them to your Page—this is especially true if you make Page posts about the group. To create a Page Likes ad:
- Go to your Page.
- Click “promote” in the bottom-left corner of your Page.
- Click “promote your page.”
- Enter the details for your ad as prompted.
- Click “promote” to start running your ad.
Link to Your Group on Social Media
Just because your group lives on Facebook doesn’t mean you can’t attract members from other platforms. Simply linking to the group with a brief “hey, check out my Facebook group” message can certainly help, but you may find greater success by linking to particularly enticing content users won’t be able to find anywhere else.
For instance, you could host a group-exclusive giveaway and link to it from your brand’s other social media profiles. If your followers have an interest in your group’s topic and see an opportunity to win a prize they otherwise couldn’t, they’ll be all the more likely to join.
Discussion forums such as relevant Reddit subreddits are also ripe with potential. The key to success on such platforms is to be active in the forum outside of promoting your group, adhere to the forum’s rules for self-promotion and only link to your group where it makes logical sense.
Promote Your Group in Other Groups
As long as you take a tactful approach, you can gain a great deal of exposure just by promoting your group in other groups. For instance, let’s say the Blue Moon Bakery is located in Los Angeles, California. In that case, the hypothetical groups SoCal Baking, LA Home Bakers and Los Angeles Recipe Swap would all be good places for the bakery to promote its own group.
If you choose to take this route, take care to be respectful and always check a group’s rules before using it to promote yours. Some groups don’t allow self-promotion at all, some only allow it at a certain time and some may allow it with permission from an admin. Whatever the case, it’s important to know and carefully follow each group’s policies.
In the same vein, don’t join a group, promote your own and promptly leave. Instead, join the group, participate in a few conversations, politely promote your own group at the appropriate time and be sure to stick around afterward. Remember, the goal is to build positive new relationships and grow your group in the process.
Get Help from Current Members
Your group’s most active members have the potential to be powerful agents of growth—who better to recruit others to a group than the people who make up its core community?
The most straightforward way to solicit help from current members is simply asking them to make posts about your group and why they enjoy it. To ensure the authenticity of their endorsements, don’t make them feel pressured to do so, and encourage them to use their own words when describing why your group is worth joining.
Alternatively, you can take a more structured approach by organizing a contest, giveaway or event. Current members can then post about it on their own Timeline, and in the case of a contest or giveaway can increase their chances of winning when they do.
How to Scale Your Growing Group
Once your group’s member count starts rising, you’ll soon encounter an increasingly challenging issue: scaling. It may be tempting to write off your scaling concerns as good problems to have, but it’s imperative to address them head-on before things get out of control.
Appoint Moderators and Admins
The first item on your scaling to-do list should be to ensure adequate moderation. Group moderators have the ability to:
- remove posts and comments;
- remove and block group members;
- approve or deny membership requests;
- approve or deny posts; and
- pin or unpin posts.
Admins can perform all the same functions, with the added ability to make another member an admin or moderator, remove an admin or moderator and change the group’s settings.
Your group’s admins and moderators can be made up of people from your organization, volunteers from the community or a mix of both. Either way, their presence will ensure your group maintains a positive and healthy community as it grows, all with minimal spam and interpersonal conflict.
To ensure everything runs smoothly, also remember to create streamlined management processes to guide admins and moderators in handling tough situations and make it clear with whom they should communicate to resolve issues. You can even use Facebook’s Units feature to create modules for admin and moderator training, group rules and more.
Schedule Posts in Advance
The bigger your group gets, the more overwhelming it can be to publish content regularly while still interacting with members on an individual basis.
The solution? Scheduled posting. This strategy allows you to create thoughtful and high-quality posts in advance, meaning you’ll free up time to oversee and participate in the day-to-day activities of your group with the least amount of stress possible.
Facebook even offers a built-in tool to schedule posts within groups. To schedule a post on Facebook:
- Go to your News Feed, click “groups” in the left hand menu and select the group for which you want to schedule a post.
- Click “What’s on your mind, [Name]?” and enter the content you wish to publish.
- Click the calendar icon () and select the date and time at which you want to publish the post.
- Click “schedule.”
Want to reschedule, delete or modify an already-scheduled post? Facebook makes it easy:
- Go to your News Feed, click “groups” in the left hand menu and select the group for which you want to manage scheduled posts.
- Click “scheduled posts” in the “admin tools” menu on the left hand side.
- Click the icon with three dots () next to the post you want to change.
- Select the change you want to make.
You also have the option to use social media management platforms like Hootsuite and Sprout Social. These allow you to schedule Facebook group posts from a central location you can also use to schedule posts for other social media sites like Twitter, LinkedIn and Pinterest.
Expand with Subgroups
If you discover a portion of your group’s members are only interested in one aspect of the group’s overarching topic, you may find it useful to create subgroups. Subgroups can also be beneficial if large segments of your community are divided by language barriers, or geographical location or demographics.
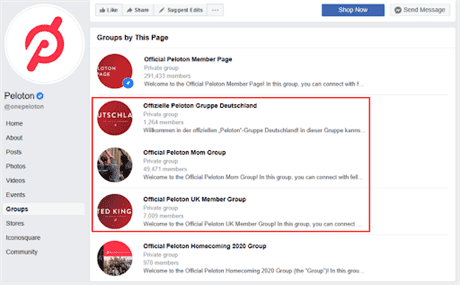
For example, Peloton’s Facebook groups include regional subgroups for residents of the United Kingdom and Germany, as well as one specifically for moms:
Creating subgroups will also give admins and moderators a chance to give their undivided attention to a single subpopulation of your group. You’ll make your moderators’ lives easier—and help members feel catered to and cared for.
A Thriving Community Never Goes out of Style
It’s an undeniably ideal time to start, grow and scale a Facebook group. Group content is natively prioritized now more than ever, and Facebook shows no signs of changing that.
The biggest benefit of learning how to start a Facebook group, though, is not that it’s a good idea right now, but that a dedicated community will never become obsolete. No matter what algorithm changes the future may hold, a successful Facebook group gives you an invaluable chance to build a vibrant community (and pool of potential customers) ready to interact with, benefit from and support your brand.
Image credits
Screenshots by author / May 2020


